Showing posts with label eat this. Show all posts

Monday, September 29, 2014

black bean bowl.

bowl4 Last week, I wrote about how I plan meals for our family. This recipe is an example of what might come of that plan. It's hardly a recipe because it was created from the ingredients we had at home on a Wednesday night, but there's no harm in sharing anyway!

It is always best to soak beans for an extended amount of time (I try to start the soaking process before I leave for work in the mornings), but in case you forget (as I did on Wednesday), here's a great how-to for quick-soaking beans. If you're new to soaking beans and would like to read a bit more, this is a well-written and informative article.

bowl1 bowl3 B L A C K  B E A N  B O W L
Serves 2, with plenty of leftovers

Ingredients
1 cup pre-soaked black beans
2 cloves garlic
1 teaspoon salt
1/2 cup steamed corn
3 small peppers, chopped
1 heaping handful spinach, chopped
1/4 of onion, chopped
1/2 avocado, sliced
Honey-Lime dressing (recipe below)

Directions
1. Cook black beans on a low simmer for one hour (for firmer beans [my preference]), or an hour and a half (for softer beans) with 2 cloves of garlic in 2 cups water, uncovered. Stir occasionally. Add 1 teaspoon salt during the last 10 minutes of cook time.
2. Divide beans into two bowls,* and top with corn, peppers, spinach, onion, avocado, and dressing.
3. We like serving with these chips.

* This is where I save the remaining beans and toppings + dressing in a reusable container for the following day's lunch.

bowl2 H O N E Y - L I M E  D R E S S I N G
Serves 2, with plenty of leftovers

Ingredients
1/2 avocado
1 tablespoon honey
1 clove garlic
juice of 1 lime
1 tablespoon coconut milk
up to 2 tablespoons water, for thinning
up to 1 teaspoon salt

Directions
1. Place all ingredients (except for water) in a blender or food processor and blend until smooth and combined.
2. If desired consistency is not reached (or your appliance needs a little extra help), add up to 2 tablespoons of water to thin the dressing. Add salt for taste.

Enjoy! xo


Wednesday, September 24, 2014

construct your meal consciously.


My dream kitchen is big and open with beautiful tile, hardwood floors, a wide, sprawling countertop, fresh flowers on every surface, and a fridge full of vibrant, organic produce. I have endless time to cook whatever my heart desires, and there's always a healthful dessert in the oven to enjoy later that evening. (I let my dreams run pretty wild.)

In reality, our kitchen is quite small. It's (more or less) galley style with scarce counter space, a very old oven/stove combination, and the refrigerator door cannot even open all the way (that might give you some reference as to how wide our kitchen is). When I get home, I'm often in a frantic mad dash to prepare something tasty and healthy.

It's all quite imperfect and, truthfully, our kitchen is the last place I want to spend my time. However, I do enjoy cooking if it involves fresh, wholesome, vibrant ingredients, so our little kitchen has to make do for now. I pretty much follow the same procedure for making our meals. I make a lot of bowls: hearty, quick meals that pack a lot of punch and taste great, too.

As a general rule, there's something from every category (above). I include mostly veggies and incorporate items from the rest of the sections, too. Obviously there are no rules to this, but I've found that I have the most success when I build from this template.

Here's to cooking (with or without that dream kitchen)! ;)

Monday, June 30, 2014

orangey whole wheat waffles + strawberry puree.

orangezestwaffles1
orangezestwaffles5 orangezestwaffles3 When I think of breakfast for dinner, I am transported to my seat at my sister's turquoise kitchen table. She is over the stove, creating some tasty dish, while her husband, Mark, is chopping red potatoes into impossibly small pieces, and nestling them into the oven to turn golden brown.

Or, it is Jeffrey and I in our small Gainesville kitchen, making a mile high stack of pancakes. My sister is sitting on the bright red stool in the corner and Mark is in the doorway. We're probably musing about Woody's good looks.

Breakfast for dinner is one of my fondest memories of my graduate work at the University of Florida. It just so happened that my sister lived a block away and we walked to each other's houses each week to enjoy some lovingly prepared dish — always breakfast for dinner, usually on a Thursday evening.

Breakfast is special, but breakfast for dinner is magical. It is especially magical when the company is good, the table is small, and the helpings are aplenty. While Jeffrey and I no longer live just a block away from my sister and Mark, our hearts are still neighbors. Sometimes it feels good to create a dish that brings back a memory. A memory of turquoise tables, small kitchens, tiny potatoes, red stools, and the best company in all the South.
orangezestwaffles4 orangezestwaffles2 O R A N G E Y  W H O L E  W H E A T  W A F F L E S  +  S T R A W B E R R Y  P U R E E

Serves 2 (with leftover puree to drizzle over anything and everything your heart desires!)

I N G R E D I E N T S

Orangey Whole Wheat Waffles
  • 1 egg
  • 1 cup (organic) whole-wheat flour
  • 3/4 cup and 2 tablespoons almond milk 
  • 1/4 cup coconut oil
  • 2 teaspoons honey
  • 2 teaspoons baking powder
  • pinch of salt
  • 1/4 teaspoon vanilla extract
  • 1-3 tablespoons water (to thin batter)
  • zest of 1 (organic) orange

Strawberry Puree
  • 6 strawberries
  • juice of half an orange (use the one you just zested!)
  • 1/4 teaspoon honey

W A F F L E  D I R E C T I O N S
  1. Preheat the waffle iron. Set aside.
  2. Beat the egg in a mixing bowl, until it is pale yellow and fluffy (a light foam should form on the top).*
  3. Slowly add the rest of the ingredients (except for the zest and the water) and beat to combine.
  4. Gently fold in the orange zest until well combined.
  5. Start by adding one tablespoon of water to the batter and fold to combine. The consistency should be slightly runny, but not too runny (a bit thicker than a traditional pancake batter). Continue adding water by the tablespoon until desired consistency is reached (I added three tablespoons, but could have added four).
  6. Coat the waffle iron with a thin layer of coconut oil. Use your waffle iron's directions to heat and cook waffles (the amount of batter per waffle is often dependent on your particular waffle iron). Serve hot with butter (we use Earth Balance), maple syrup, and a dollop of strawberry puree (directions below).
* Note: A fluffier egg leads to fluffier waffles. Beat a little extra if you're a fluffy-waffle lover.

P U R E E  D I R E C T I O N S
  1. Wash the strawberries and remove the stems.
  2. Place strawberries, fresh orange juice, and honey into a blender and pulse until combined.
As an aside, this makes plenty of puree (much more than we needed for this recipe). Its other possible uses are endless: on yogurt, in oatmeal, on ice cream, added into a tasty smoothie of coconut milk + ice cubes, etc. Yum!

Wednesday, June 25, 2014

the midday cookie.

middaycookie4 middaycookie1 Today's cookie was born from a 2 o'clock craving for something sweet and a bit salty. You know the feeling; it strikes suddenly and quietly — but urgently — and rests in the back of your mind until you find some way to satiate it. When it's Friday afternoon and the pantry could use some attention, one must get creative in choosing ingredients.

The Internet is a beautiful place because after a quick Google search for a recipe involving buckwheat flour, I found my ticket to satisfaction. Because I must fiddle with things, I made a few adjustments to a recipe that I'm sure was already quite delectable. I picked up a Mast Brothers chocolate bar during a recent trip to New York City, and it seemed a shame not to allow its contents to be the true star of this recipe. Megan, the genius behind this cookie, also wrote the recipe so that it only yields one serving (two cookies). A blessing or a curse? I'll let you decide.
middaycookie3 middaycookie2 T H E  M I D D A Y  C O O K I E
(Adapted from and inspired by Detoxinista)

Serves 1

I N G R E D I E N T S
  • 2 level tablespoons buckwheat flour*
  • 1 tablespoon coconut palm sugar
  • 1 teaspoon coconut oil, melted
  • 1 teaspoon peanut butter
  • 1 teaspoon water
  • 1/4 teaspoon vanilla extract
  • pinch of sea salt, plus more for the tops of cookies
  • 3 squares Mast Brothers dark chocolate with Stumptown coffee
*Note: This recipe tastes strongly of buckwheat flour. If you're not a fan, I would suggest checking Megan's original recipe, where she offers an alternative suggestion that might strike your fancy.

D I R E C T I O N S
  1. Preheat* the oven to 350º F and line a small baking sheet with parchment paper. Set aside.
  2. Mix all ingredients (except for the chocolate) until combined. They should form a thick, pasty substance, slightly more moist than your average chocolate chip cookie dough.
  3. Break the squares of chocolate into smaller chunks and fold them into the dough until just combined.
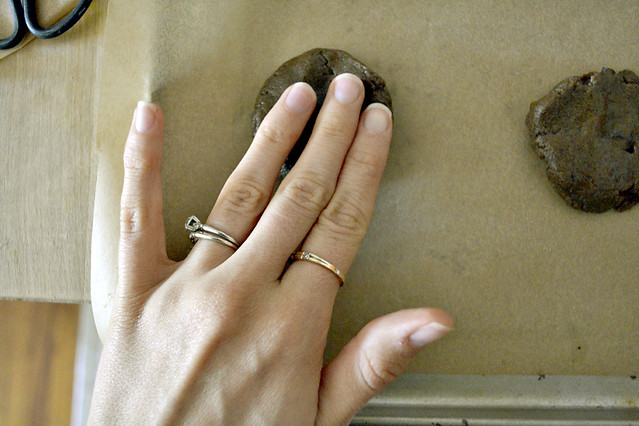
  4. Form two cookies of about equal size on the parchment paper. Gently flatten to desired thickness. Sprinkle a bit of sea salt on the top of each cookie.
  5. Bake cookies for 8-12 minutes,* and allow them to cool slightly before serving.
* Note: Because this is such a small recipe, I used my toaster oven to bake these cookies instead of a traditional oven. The baking time will change slightly (my toaster oven does not have a preheat option). My cookies baked for 12 minutes instead of the original suggestion of 8 minutes. As always, keep a good eye on your cookies so that you can rescue them at just the right moment!

Thursday, June 19, 2014

a week of lunches.

lunch_day1

1. Chopped strawberries + unsweetened coconut flakes // 2. Brown rice pasta, cucumber, carrots, green pepper + garlic-ginger pumpkin seed sauce // 3. Cucumber + carrots with black bean hummus

lunch_day2

1. Romaine lettuce + spinach with cherry tomatoes, carrots, navy beans, and sunflower and sesame seeds // 2. Chopped strawberries + kiwi // 3. Garlic-ginger pumpkin seed sauce (to dress the salad) // 4. Chickpea croutons

lunch_day3

1. Black beans and brown rice, covered by mixed greens, sunflower sprouts + avocado (and some red blanket sauce is hiding under there) // 2. Chopped Granny Smith + almond butter // 3. Turkish dried apricots, banana chips + dried mango

lunch_day4

1. Romaine lettuce + spinach with green peppers, cucumbers, pumpkin seeds, and sunflower seeds // 2. Chopped Granny Smith apple + almond butter // 3. Chopped kiwi + unsweetened coconut flakes // 4. Garlic-ginger pumpkin seed sauce (to dress the salad)

lunch_day5

1. Black bean salad with cumin-roasted carrots, over a bed of Romaine lettuce // 2. Black bean hummus // 3. Watermelon + cucumber spears

I find a sort of comfort in my lunchtime meal. There's something nice about a midday break and the opportunity to sit and enjoy some sustenance. During the school year, I made my lunches the night before, and while it was sometimes a bit of an inconvenience, I always appreciated the forethought when it actually came time to sit and eat the tidbits I had lovingly prepared for myself. Now that I'm on summer vacation, my meals look a bit different, but I still do my best to prepare them with the same amount of care and attention so that I can honor my body and give it the fuel it deserves.

P.S. I'm in the process of revamping the blog, so please excuse the dust! :)

Wednesday, June 5, 2013

drink this: homemade chia seed drink.

Chia seeds are the tiniest (cutest!) little seeds and they are so amazingly good for you. Here's what they're packin':
  • Antioxidants (tons!)
  • Calcium
  • Protein
  • Potassium
  • Fiber
  • Omega 3s
Plus, they're also very detoxifying (great for the liver and the immune system) and they have a looooong shelf life. Yay! I'm blown away by these incredible little wonders (Seriously! How can they be so good for you and be so small?) and today's recipe involves a really tasty drink that you can enjoy at anytime of the day. Scroll to the bottom for the full recipe! :)
chia1 chia2 chia4 chia3 chia5
Ingredients:
• 3 tablespoons chia seeds
• 1 cup warm water
• 1 cup 100% cherry juice
• the juice of 1 lime

Directions:
1. Pour one cup of warm water into a sealable container. Pour 3 tablespoons of chia seeds into the warm water and gently swirl to combine. Cover and place in the refrigerator overnight.
2. Remove your chia seeds from the refrigerator. Stir them around. Your chia + water mixture should have a gelatin-like consistency.
3. Pour 1 cup of cherry juice into a drinking glass. Squeeze the juice of one lime into the juice. Stir.
4. Spoon 2-3 heaping spoonfuls of the chia mixture into the cherry + lime juice and stir to combine.
5. Enjoy!
* Note: I find that my chia seeds tend to congregate toward the top of the juice (or sometimes near the bottom — they like to stay together!), so I just mix with a spoon to keep things combined.
chia6

Wednesday, May 22, 2013

eat this: lemon pepper pasta + brussel sprouts and bacon.

brussels4 brussels3 brussels2 brussels1
Yum! My mouth is watering just thinking about this meal, which we ate on Sunday evening. It was so easy to throw together, it almost didn't seem real. As Jeffrey likes to say, true restaurant quality. The pasta is from Trader Joe's. Simply prepare it as directed and coat with a dash of olive oil and salt. If you're like us then your love for parmesan cheese knows no bounds, so why not add that as well?!

The brussel sprouts with bacon is something I've seen floating around a lot these days, so I thought it must be tasty. Well, it was. I strongly suggest that you make this as soon as you can because it is SO. GOOD. (And, just for reference, I'm usually not all about people using periods. to. make. a. point, so you know I'm serious.) The recipe came from the New York Times. We prepared it as a side dish, although I'm sure it would be tasty tossed into the pasta (my personal preference would be to keep it separate, though). We used bacon instead of pancetta and we didn't use the chile or lemon juice, since our pasta was lemon-y enough. Enjoy! X, J&R

Monday, April 29, 2013

eat this: fresh arugula + fontina flatbread.

flatbread4 flatbread2 flatbread1 On our honeymoon in Portland, OR we ate at the most amazing Spanish tapas-style restaurant. It was a meal that the two of us will never forget. When we got there, they sat us at the chef's counter where we watched all the food being prepared in a precise but fluid hurry. We were in awe seeing all the chefs move together in what was one of the tiniest restaurant kitchens I've ever seen. They didn't even bat an eye! We ordered so much food and enjoyed every morsel, but our favorite item on the menu was an incredible flatbread that was so flavorful and delicious we could hardly believe it!

When we got home, we vowed that we would try to replicate the recipe in our own kitchen. We were really pleased with the results and wanted to share them with you. The one ingredient that we don't have is black truffle oil (which really does add a special flavor), but we used some olive oil and it still tasted really, really good.
flatbread3 Fresh Arugula + Fontina Flatbread
Serves 2 

INGREDIENTS
Pizza dough (we like the pre-made one from Trader Joe's)
1/2 cup fontina cheese, shredded
1 cup fresh arugula
2 cloves minced garlic
2 tablespoons + 1 teaspoon extra virgin olive oil
The juice of one lemon
Splash of balsamic vinegar
Salt + pepper to taste
* These measurements are approximate. We did not measure anything out when we made this.

DIRECTIONS
1. Preheat the oven to 500º F.

2. Divide the dough into two equal pieces and roll as flat as possible. Brush about 1 tablespoon of olive oil onto each flatbread so that the entire surface of each is lightly covered. Spread minced garlic over the dough (1 clove per bread, we like garlic so you could easily dial this down). Cook the flatbread for 8-9 minutes, or until the top of the dough is crispy.

3. As the dough cooks, rinse arugula under cold water to refresh the leaves. Place in a bowl and dress with 1 teaspoon olive oil, the juice of a lemon, and a splash of balsamic vinegar. Mix the leaves until they are evenly coated. Add salt and pepper to taste. Set aside.

4. Shred about 1/2 cup of fontina cheese over a small bowl. Set aside.

5. Pull the breads from the oven and generously cover each with cheese. Place back in the oven for 3-4 minutes, or until the cheese is just melted and the crust looks golden brown.

6. Remove from the oven and spread the arugula leaves over each flatbread. Lightly brush the crust with olive oil & enjoy!

- J&R flatbread5
Related Posts Plugin for WordPress, Blogger...